about the banner…

Water lilies at the Brooklyn Botanical Garden Orchid Show, April 5, 2014. Taken with the Nikon D610 + AF-S Zoom NIKKOR 24-85mm f/3.5-4.5 G ED VR. 1/600 s @ f/5.6 -0.67, ISO 800.

Wednesday, August 31, 2011

Enhancing Low Resolution Images

From time to time, you may want to crop an image to achieve a tighter zoom and restore it to its original resolution. Or, you may need to prepare an image for publication when all you have available to work with is a low res version.

Depending on its use in print or electronic media, a low-res image may be “placed” at a size larger than its native dimensions through the use of an application such as InDesign or Dreamweaver. Under these circumstances, you are at the mercy of the software that will “rip” the image into a PDF or other press-compatible format, or the imaging engine within the web browser or other viewing application. By increasing the resolution in the post-processing phase, you will have more control over how the image will be appear in its final form.

Through the process of “resampling”, an image’s pixel resolution can be increased to an adequate density to avoid “aliasing” (the visibility of individual, square image pixels). However, the actual image information does not increase. Additional pixels needed to make up the difference in resolution are added based on averaging values between the original pixels. This results in a softening of the image. However, there are steps we can take to create the illusion of sharpness and detail.

Images that have been resampled are often void of any significant texture. This texture can result from film grain or sensor noise, but it adds to the perception of sharpness.

Sharpening the image through the use of Unsharp Mask can also restore the perception of sharpness, but it will also accentuate the pixels themselves, so it must be done after resampling.

Finally, the resampling process itself is critical, as it too will accentuate the pixels, resulting in “aliasing”, creating jagged, stepped edges on curved or diagonal elements.

How to Enhance a Low Res Image
The original image was taken with a zoom lens set at 85mm (127.5mm equivalent):

Original version 4,288 x 2848 pixels.


It was then cropped as desired to achieve the equivalent of using a 286mm lens, a 224% enlargement:

Cropped version, 635 x 956 pixels

However, the image is now considered low resolution, the effective resolution having dropped from 300 ppi to 133.78 ppi. Through resampling, we can restore the original resolution to 300 by interpolating (adding additional pixels between the exiting ones by averaging their values). The image is now 4,288 x 2848 at 300 ppi, but has softened due to the effects of interpolation. By using the steps below, we can  enhance the image to mask these undesireable effects:

1. In Photoshop’s Image Size dialog (Command + Option + I), enter in the target dimensions, check the “Resample Image” box, and select “Bicubic Smoother” from the menu…
2. Apply Filter > Sharpen > Unsharp Mask at a high amount and low radius…
3. Apply Filter > Noise > Add Noise…
4. Finally, Apply Filter > Blur > Gaussian Blur… at a very small radius (under 1 pixel) to take the edge off the grain and make it appear more natural, like film grain…
The values used here are good starting points, but you may want to adjust them for optimum results. The goal is to avoid the telltale halos of sharpening at a high radius and to add detail in the form of random noise to hide the effects of interpolation through resampling.

Final image, restored to its original pixel dimensions of 4,288 x 2,848.

I’ve used this technique successfully with clients who have supplied me with low-res images. After processing, the client was unable to tell that the source was the original low-res image.

Monday, August 29, 2011

The Panorama

The panoramic image is a popular pursuit in photography. So much so, that features to assist or create them are almost always incorporated in modern digital cameras.

The latest cameras have the ability to capture multiple frames while panning and “stitch” them together right in the camera. This is ideal for several reasons that I’ll discuss in a moment. Less recent cameras have had the ability to assist in composition by presenting a partial overlay of the previous frame for alignment, with external software used for the stitching. All of this is fun to play with, but there is more to producing a true panorama than meets the eye. Or the lens.

Lenses are subject to vignetting and barrel distortion, which alters the exposure and geometry of the edges of the photo in relationship to the center. And, since the left edge of one photo is the right edge of another, the geometric distortions occur in opposite directions. The vignetting is relatively easy to fix, but the geometric distortions are not. So, when working with multiple frame capture panoramas, some precautions are in order.

  • Avoid using wide-angle lenses, or any lens with significant barrel distortion.
  • Avoid using lenses with pronounced vignetting if possible.
  • If using a zoom lens, avoid inadvertently changing the zoom angle.
  • Use the camera in a vertical (portrait) orientation to minimize geometric distortions
  • Use a pan-head tripod that has been leveled to the horizon.
  • Use substantial overlap when composing the image frames.

The idea is to produce many thin image slices that are as free from distortion as possible. Using the camera vertically assures the maximum vertical resolution with minimal geometric distortion, since you will be in control of the horizontal resolution by how many frames you capture and compose. Here, digital cameras with the “Scanning” panoramic feature has the advantage. It can compose its image from many thin slices stitched together using intelligent software, not unlike the swing-lens film cameras below.

True Panoramas
The best way to produce a true panorama is through the use of a specialized panoramic film camera.

Horseman SW617 120-Format Panoramic Camera
    Some cameras use a panoramic frame format with a stationary, large coverage lens. The 120 format is ideal for this application, as the absence of sprocket holes maximizes the image area. This is difficult in the 35mm format, as most lenses do not possess the coverage necessary to expose the full width of the negative, even with vignetting.

These cameras produce extraordinary images, but at a price of several thousand dollars.
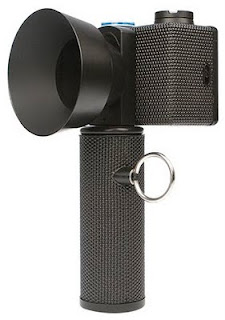
Another type of panoramic camera is the “swing lens”. These cameras create one long continuous exposure by scanning the scene, which is done by rotating the camera and/or advancing the film, thus avoiding the coverage issue. These cameras produce good-quality, but no less compelling images at a cost of several hundred dollars.

Lomography’s Spinner 360 produces a frame approximately 172mm long on 35mm film that produces a 360° view. The image extends over the sprocket holes.
   
Lomography’s Spinner 360 35mm 360° Camera
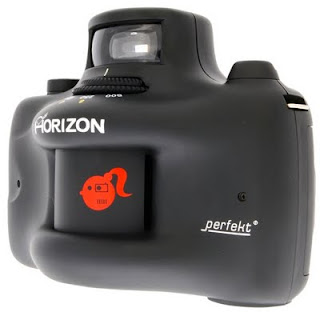
Horizon Perfekt 35mm 120° Panoramic Camera
    The Lomography Horizon Perfekt produces a 58mm wide negative with an approximate 120° of coverage. Nearly two full 35mm frames. The camera remains stationary while the lens scans the scene.
True Digital Panoramic Solutions
To produce true panoramic images in the digital domain is more challenging. With a medium format DSLR such as the Pentax 645D, a single high resolution image can be captured with a wide angle lens and cropped accordingly. This would produce a frame 7,264 pixels wide. With a small format DSLR you could use a wide angle or fisheye lens to capture a single frame and crop accordingly, producing an image of between approximately 4,000 and 6,000 pixels wide depending upon the resolution.

Monhegan Island, Maine. A single capture “cropped” panorama.
To overcome resolution limitations, there are two techniques that can be used to combine multiple frames; panning and shifting.

A tilt-shift lens, also known as perspective control, can be used to capture two side-by-side images with little or no geometric distortion. You shift the lens to one side, capture the image, and shift the lens to the other side for the second, resulting in a modest gain in resolution.    
A Tilt-Shift lens can avoid geometric distortion.
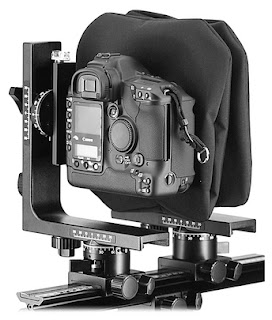
The Horseman LD View Camera gives a DSLR
the movements of a view camera.
    Another device, which turns a DSLR into a full-featured view camera, uses medium format lenses with wider coverage that can produce images with up to four times the resolution of a single capture. Because it does this through shifting and not panning, geometric distortion is a non-issue. You can use the additional horizontal width to produce stunning panoramas, or take advantage of both vertical and horizontal shift to increase resolution.
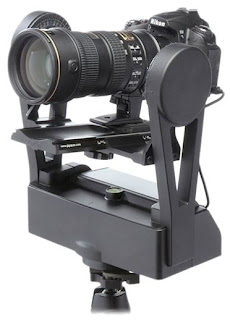
To produce enormous resolution aka “gigabit” images, a robotic mount can be used to combine many, many image captures with intelligent stitching software. This system works best with longer lenses, which have very little geometric distortion and thus present less of a challenge to the software.

You can easily program the mount to produce panoramic images to your specifications. While these are not “true” panoramas, the minimal distortion afforded by the longer lens will be largely unnoticeable.
   
GigaPan Epic Pro Robotic Camera Mount
The Triptych
Lastly, and not to be discounted is the simplest form of panoramic photography: the triptych. The triptych form originates from early Christian art in which altar paintings or carved panels were produced in three sections.

Head of the Harbor, Maine; Triptych of three separate images, approximately 14MP.
These images of Boothbay Harbor, Maine were captured on Fujifilm Superia 400 facing south from the head of the harbor. They were not intended be part of a panoramic image, but assemble quite nicely into a triptych. With a little more planning, this could have been a stunning 36MP digital image.


Friday, August 26, 2011

Panoramics


Monhegan Island, Maine. Voigtländer 20mm f/3.5, vertically cropped.


Gregory School. Samyang/ProOptic 8mm f/3.5 fisheye geometrically corrected (somewhat) and cropped.


Thursday, August 25, 2011

Camera Update: Nikon Coolpix P7100


Coming in September, the Nikon Coolpix P7100 updates the venerable P7000. It apparently improves on it’s predecessor with snappier performance, and an improved software interface. It succumbs to peer pressure with an articulated LCD display and front command dial. Subtle cosmetic changes alter its appearance only slightly.

Wednesday, August 24, 2011

Camera Update: Nikon Adds All-Weather AW100 to their Coolpix Lineup

The Nikon Coolpix AW100 is Nikon’s first ruggedized compact digital camera
Able to weather the extremes of moisture, shock and temperature, Nikon’s latest addition to the Coolpix line features GPS in-camera mapping and an electronic compass. With an aperture range of f/3.9-4.8 and a top shutter speed of 1/1500 sec. it has modest performance, but really delivers with a capture rate of 7.1 fps for a total of three frames; enough to get the shot under challenging conditions.

Film Galore!

Today I received my first batch of film. All fresh, with expiration dates in 2013. More is on the way. At least I dodged Kodak’s price increase this time. Maybe next time not so lucky.


I’ve been following some threads regarding the latest price increase. Everone seems to have a different take on the reasoning behind it, ranging from seeing what the market will bear to learning which films make money. How about this; just about everything’s going up, why would a niche product like film be any different?


If a roll of film costs $7.50 (and that’s for Kodak’s best film) that’s still only 21 cents a frame (OK, 30 cents with processing). You can’t even get a cup of coffee for that, and a picture lasts a lot longer.


When I do shoot film, I do all my preliminary work in digital. Then I just set up my film camera to mirror the digital setup and take my final frames. Very little film is wasted, so I try not to worry about rising film prices too much.


Sunday, August 21, 2011

“The perspective of an image is controlled by the distance of the lens from the subject; changing the focal-length of the lens changes the size of the image, but does not alter the perspective. Many photographers overlook this fact, or are unaware if its significance.”

— Ansel Adams; Examples: The Making of 40 Photographs


This sums up the whole zoom lens issue. If you fully understand this concept, you may use a zoom lens to your heart’s content, with the full knowledge that it’s not a limiting factor in your work.


Saturday, August 20, 2011

Clock Tower, Newark Broad Street Station

Canon Powershot SD780 IS; 1/125 @ f/4.5, ISO 200. Perspective corrected in Adobe Camera Raw.
I was traveling westbound, and as the train pulled into the Newark Broad Street Station, I caught a glimpse of the morning light falling onto the tower. As luck would have it, the train stopped at the perfect location to photograph the tower head-on, so I quickly pulled out my Canon and took this single shot.

Wednesday, August 17, 2011

Manual Exposure

In any photographic situation, its always good to have a general idea of the intensity of the light you're working with. Therefore, learning to shoot manually is a worthwhile pursuit, even if you’re using an auto exposure camera.

Shooting manual is like driving a stick shift; it can get you out of a lot of sticky situations, and gives you a better understanding of the underlying mechanics.

In simplest terms, to take a photo with manual exposure is to first determine the light level, set the camera to the appropriate combination of shutter speed and aperture for the required exposure, compose, focus, and release the shutter. Simple enough.

But what’s not so simple is balancing the four variables required to accomplish this; LV, ISO, Av and Tv.

LV or Light Value, is the intensity of the light you’re working with, and it’s the most important variable of all. It can be measured as the light reflected by the subject, or the light falling on the subject (incident). It can be measured by your camera, and also by a dedicated light meter. And believe it or not, it can also be measured by the human eye through experience. LV is measured in stops, which correspond to shutter speeds and f-stops.

ISO (also designated as ASA or DIN) represents the sensitivity of the film you’re using, or how the sensor is set to interpret the light. Sensor sensitivity does not change; when you set ISO on your camera, you’re instructing it to use a portion of the sensor’s maximum sensitivity. ISO is measured in stops, which correspond to shutter speeds and f-stops.

The combination of LV and ISO determine the EV, or exposure value. The EV changes in relationship to the ISO, but the LV does not. At ISO 100, EV is equal to LV. At ISO 200, the EV decreases by one stop. At ISO 50, the EV increases by one stop. Which brings us to Tv and Av, or shutter speeds and f-stops.

Tv or Time Value is represented by the shutter speed measured in fractions of a second. It’s one of the two components that make up EV.

Av or Aperture Value is represented by the size of the opening that allows light to enter the camera, measured in f-stops. It’s the second of the two components that make up EV.

The combination of Tv and Av determine the Exposure Value, and as one increases, the other decreases. Therefore, if EV14 is equal to 1/2000 @ f/5.6 @ ISO 200, then it’s also equal to 1/1000 @ f/8.0 and 1/4000 @ f/4.

So right about now you’re probably wondering why cameras don’t simply have an EV setting, which would simplify things a great deal. The reason is because with the right combination of shutter speed and aperture you can freeze action, isolate a subject from it’s surroundings, create motion blur, or reduce the need to focus.

Shooting manual requires that you know which combination of shutter speeds and apertures yield a given EV at a specific ISO. This information can be memorized, or referenced using an exposure table.

It also requires that you know the light level you’re working with as known from experience or obtained through a light meter.

Memorizing a table of Light Values is much easier than Exposure values, because there are only about 14 EV steps to worry about, but each can have as many as 10 combinations of shutter/aperture values.

You can train yourself to judge LV levels by eye by playing a little game. Memorize the table below, and carry a pocket light meter set to ISO100 with you wherever you go. As you encounter different lighting situations, try to guess the LV first, then measure it. After a while, you’ll be able to estimate LV by using a combination of the general conditions, and what your eyes are telling you.

Exposure Value Conditions
LV18 Bright reflections off a sunlit object, such as the sea
LV17 A white object in full sunlight
LV16 Light gray object or skin in full sunlight
LV15 Gray card in full sunlight
LV14 Typical level for side-lit subjects in full daylight
LV13 Typical shadow in a daylight scene; cloudy-bright days
LV12 Bright overcast
LV11
LV10 Dark, dreary overcast day
LV9
LV8
LV7 Typical indoors; outdoors about ten minutes after sunset
LV6
LV5
LV4
LV3 Brightly lit night street scenes
LV2 Typical night street scenes
LV1 Dark outdoor scenes at night
LV0 Light level requiring an exposure of 1 sec @ f/1.0 @ ISO 100
LV-1
LV-2
LV-3
LV-4
LV-5 Scene lit by a full moon
LV-15 Scene lit only by starlight

If you memorize at least one ISO/LV/Tv/Av combo, you’ll be able to “count the clicks” to the correct exposure. For example, set your camera to ISO 200, f/5.6 @ 1/2000. This is the exposure for a sunny day at LV14.  Now, moving indoors to a brightly lit room, the LV drops seven stops to LV7. Open up the aperture two stops to f/2.8, and bring the shutter speed down by five stops to 1/60, and you’re there.

If you want retain the wider depth of field afforded by the f5.6 aperture, adjust the ISO instead of the shutter speed. Setting your camera to ISO 800 gives you two stops. Bringing the shutter speed down to 1/60 gives you the other five, and you can keep the aperture at f/5.6.

If however you’ve got a fast f/1.4 lens, you can continue to shoot at ISO 200, but use a shutter speed of 1/125 which gives you a noise-free image with a narrower depth of field, and perhaps less edge sharpness.

All of this becomes second nature after shooting manual for a while, which makes it all the more easy to understand when you use your camera’s auto exposure system.


Tuesday, August 16, 2011

The Digital Deception

For me, the jury’s still out on digital photography.

Don’t get me wrong. I’m not knocking digital photography. I find it convenient, liberating and am quite enjoying my digital journey. But I must admit, the fascination has worn off a bit. Its superiority to film is debatable, and as time progresses something new is factoring in; planned obsolescence.

Wednesday, August 10, 2011

Film Update: Even Kodak Doesn’t Know What’s Going On

I spent about 45 minutes in Target the other day trying to find the answer to a simple question; what is the pixel resolution of the images you receive on a Kodak or Target Picture CD.

Tuesday, August 9, 2011

Film Update: More Fujifilm, Target Bows Out

Duane Reade seems to be the place to go for Fujifilm. The other Duane Reade in Penn Station, on the lower level at the north end, has even more Fuji film and disposable cameras. Walgreens on the other hand seems to be aligned with Kodak, and they also have their own house brand.

Monday, August 8, 2011

Oxymoron?

You decide.

Sunday, August 7, 2011

Holga Camera Bag

With two Holgas and a slew of accessories, I was looking for an inexpensive bag to store all my Holga gear in one place. Something off brand. I even tried the Lomography store (even though that would NOT have been particularly inexpensive), but I just couldn’t find the right bag.


LowePro Advetntura 170 Camera Bag


Then, I came across the Lowepro Adventura 170. With messenger-bag styling, enough height to fit my 120WPC slid in sideways, and a price tag under $23.00 at B&H Photo, I searched no further.


It has three interior compartments afford by two padded dividers. I can fit both cameras, plus all of my accessories to date. The kitschy orange interior kind of fits with the whole Holga concept; a little less serious than the gray interiors of the higher-end lines. I must say though that it would also work quite nicely with a gripless SLR with an extra lens or perhaps a flash on a day outing.


A diehard Tamrac fan, I can’t seem to get away from LowePro these days. It all started when my partner gave me the Nikon Coolpix P5100 as a gift, along with the LowePro Rezo 50 camera pouch, which fits it like a glove. Now, everytime I look for a bag, LowePro seems to have the solution.


Thursday, August 4, 2011

Film Found

I had a few moments before I caught my morning train, so I stopped in at the Penn Station Duane Reade, and low and behold, I found Fuji film.

Wednesday, August 3, 2011

Day for Night: The Holga HL-N

Boothbay Harbor, Maine
Nikon D90 + Holga HL-N
One thing that the Holga HL-N seems to excel at is taking dark pictures. It’s tricky judging the exposure by chimping, and as you work your way down to the correct shutter speed, you invariably wind up with images like this…dark and underexposed.

Underexposure is one of those hollywood tricks that allows night scenes to be filmed during full or partial daylight. With plenty of light available, you control how much of it you use. Instead of trying to fight the Holga HL-N, you can use its unique characteristics to your advantage.

This image is a throwaway, unless you view it in a different “light”. Scanning quickly through my images in Adobe Bridge, I forgot I shot this with the Holga and thought it was a night scene. Upon closer inspection, it has some very pleasing aesthetic qualities. Using Adobe Camera Raw, I opened it up slightly with Brightness, then pulled the darks back down with Contrast to achieve the same overall brightness level but with more luminescent highlights. The image is quite sharp for a single-element meniscus lens.

If I wished to intentionally create a night scene during daylight or dusk, I could easily reach for this lens, knowing its unique characteristics.

Head of the Harbor, Boothbay Harbor, Maine
Nikon D90 + Holga HL-N + Holga .5X Wide Angle Adapter
This image is more of a “normal” exposure for this lens. Interestingly, it was shot with the .5X Wide Adapter, which in my opinion doesn’t make that much of a difference. It certainly doesn’t look 45mm to me. But because of the way the HL-N is designed, it does not significantly reduce the vignetting effect, which is a good thing. It also doesn’t seem to degrade the sharpness significantly.


Monday, August 1, 2011

Boothbay Harbor Region, Maine

Piers 7 and 8, Boothbay Harbor

Monhegan Island, Maine 

Roadside Flowers, Monhegan Island, Maine

Monhegan Light and Bell, Monhegan Island, Maine

View from Monhegan Light looking west, Monhegan Island, Maine

Pemaquid Light, Pemaquid Point, Maine

View of coastline from Pemaquid Light, Pemaquid Point, Maine

Fresnel Lens and Lightbulbs, Pemaquid Light, Pemaquid Point, Maine

Fresnel Lens, Pemaquid Light, Pemaquid Point, Maine

Pemaquid Light, Pemaquid Point, Maine

Rocks, Pemaquid Point, Maine

Echnicea, Coastal Maine Botanical Gardens, Boothbay, Maine


Frog, Coastal Maine Botanical Gardens, Boothbay, Maine 
Flowers, Coastal Maine Botanical Gardens, Boothbay, Maine

Echinacea, Coastal Maine Botanical Gardens, Boothbay, Maine

Flowers, Coastal Maine Botanical Gardens, Boothbay, Maine

Cannas Tropicana , Coastal Maine Botanical Gardens, Boothbay, Maine

Water Lillies, Coastal Maine Botanical Gardens, Boothbay, Maine

Flower, Coastal Maine Botanical Gardens, Boothbay, Maine

Flowers, Coastal Maine Botanical Gardens, Boothbay, Maine

Lavender, Coastal Maine Botanical Gardens, Boothbay, Maine

Flowers, Coastal Maine Botanical Gardens, Boothbay, Maine

The Charles Winslow, Robinson’s Wharf, Maine

Sunset at Boothbay Harbor, Boothbay, Maine

Head of the Harbor, Boothbay Harbor, Maine

Head of the Harbor, Boothbay Harbor, Maine

Reid State Park, Georgetown, Maine

Sunset at Boothbay Harbor, Boothbay, Maine

Lobster Trap, Boothbay Harbor, Boothbay, Maine

Little House, Boothbay Harbor, Boothbay, Maine

Sawyer’s Island, Boothbay, Maine

Frog, Coastal Maine Botanical Gardens, Boothbay, Maine
Head of the Harbor, Boothbay Harbor, Maine

Fresnel Lens, Pemaquid Light, Pemaquid Point, Maine

View looking west from Pemaquid Light, Pemaquid Point, Maine

Portico, Head of the Harbor, Boothbay Harbor, Maine

Sawyer’s Island, Boothbay, Maine

Echinacea, Coastal Botanical Gardens, Boothbay, Maine

Leaves, Coastal Maine Botanical Gardens, Boothbay, Maine

Water Lillies, Coastal Maine Botanical Gardens, Boothbay, Maine

Flowers, Coastal Maine Botanical Gardens, Boothbay, Maine